Sunday, July 17, 2011

Island Power

Today, we replaced the old kitchen and dining room outlets with new, classier ones.  Nothing wrong with the old outlets, but they just didn't match the newer style ones that we've been installing throughout the house for the past few years.  As you can see, Amanda is a fanatic about getting it right the first time.


Keeping the operation on the level


Finished product


After wrestling with the stiff wires in the outlet boxes, I set up shop in the basement and ran power wire from the island junction box (mounted in the basement ceiling) to the breaker panel.
Convenient basement operating table


Junction box that feeds power to the two island outlets

Tomorrow morning, I will clear the garage for the counter top delivery, scheduled to start around 10am and continue into late afternoon. 


Saturday, July 16, 2011

Totally Floored

I assembled the replacement floor nailer and recommenced installing flooring in the hallway.  Here's the final row of felt paper, which provides a vapor barrier as well as some cushioning:


Sliding another pack of 100 nails into the nailer 


The sheet metal at the top of the vent was too bulky for laying floor boards, so I decided to cut the excess with our tin snips.  Awkward angles for cutting, but I eventually got it trimmed to the surface.


The next step was to make some custom cuts in the floor boards for the vent.

Jig saw cuts in boards for vent opening

New oak vent cover

So, with this much floor yet to cover:


And this many boards:


Will we be able to finish the job without another trip to Home Depot for more?

Completed floor with the single excess board
Just one board to spare!

Tomorrow, we will clear a path for the delivery of our counter tops.

Friday, July 15, 2011

Molding and Kickboard

 While we waited for the delivery of our replacement floor nailer, we measured, cut and installed about 40 feet of shoe molding along various walls, and cherry veneer on all of the kick board surfaces.  Quarter round will be added later.

Kickboard veneer and molding in the dining room

Sharron disassembled the remaining old cabinets on our deck.  We have a lot of debris to haul to the dump when we get the chance.


 Our new nailer arrived at 3:30, but we still have to attach the handle, etc. before we can use it, so I decided to try our repaired nailer, just to see if it really worked.  Ye of little faith may be surprised to learn that it works perfectly well!  So, tomorrow we will put the new nailer to work and finish the flooring.  

New floor nailer in the box


Oh, and the counter top installation is scheduled for Monday - all day.

Thursday, July 14, 2011

Love Those 30-day Warranties!

Broken percussion head

After nailing in a few boards this morning, the rubber head popped off of our new floor nailer!  Fortunately, it is still within the initial 30-day warranty period, and I was able to convince Amazon.com Customer Service to ship us a new nailer with one-day delivery.  So, we should still be able to finish the flooring this weekend.


And, in case I get impatient, I can give our "repaired" nailer a try.  I'm dying to see if it works with the duct tape to keep the head from popping off.  After all, duct tape fixes anything, right?

Hey, don't laugh - I bet it will work!


With the nailer out of commission, I switched my attention to working on the transition between the old floor in the family room and the new floor in the hallway.  After determining how much to cut off of the new boards to create a smooth line, I used a piece of finished pine as a straight edge to guide the router.


Uneven floor boards before trimming with router

The router can't reach the end boards near the walls, so I used our small pull saw to slowly cut away the excess from two boards to complete the cutting phase of this project.

Pull saw for trimming end boards

Pull saw detail


The next step was to cut a floor board to size and route, then sand along the length for a close fit between the two areas.  It took about 10 attempts to slowly cut the board to the proper width with our belt sander, but I had to start with one over-sized to avoid any large gaps in the installation.  Here's the finished product:

1-7/8" wide spacer board for transition between old and new flooring

We are down to our last two boxes of floor boards, which just might be enough to finish the job.  We'll find out this weekend!

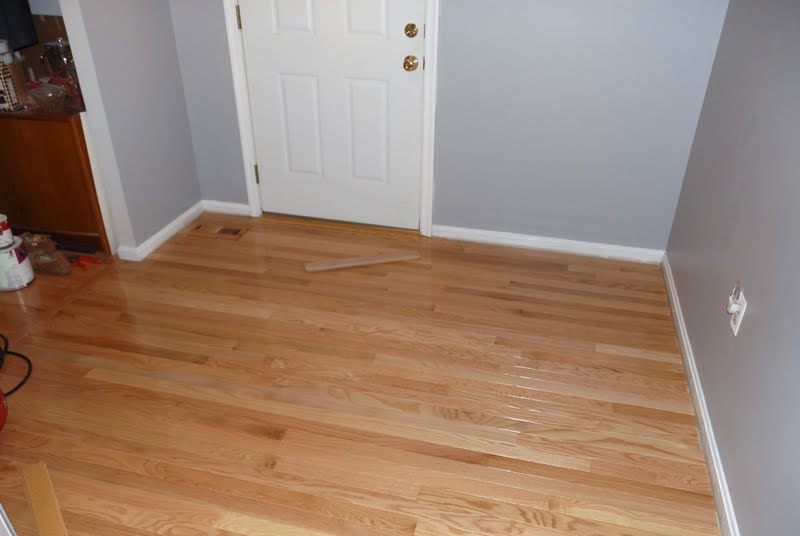
View from family room toward kitchen

Wednesday, July 13, 2011

Out of the Closet

This morning, I finished working my way around the closet frame and installed flooring about two feet or so toward the front door before I had to quit for lunch and a visit to our granite fabricator.

The third slab arrived today and Amanda and I went out to inspect it and work with the fabricator on what parts of the stone we wanted to include in the various counter tops.  Here's the third slab:


 While we were admiring the granite, I noticed that one of the workers was cutting the hole in our vanity marble top for the soap dispenser.  The sink cut-out had been polished and the faucet hole was already drilled.  Here's the soap hole being drilled:


Amanda provided some invaluable inspection services for the granite.  The blue lines are the approximate locations of the various pieces for the kitchen sink area, dining room and island.


Our granite with templates


When we got back home, I nailed in a few more rows of floor boards and called it a day.  Here's how it looks at present.  As part of the finishing work, we will install quarter round to hide all of the board ends for a neat appearance.


Interface between old boards in living room and new boards in hallway

Transition detail

Tuesday, July 12, 2011

You're Gunna Need Another Slab!

Our granite fabricator called this morning to inform me that when they layed the templates on our two slabs of granite, it was clear that we would need a third slab to do it all.  The good news is that the additional granite is in stock and will be available tomorrow for the layout.  Cutting is scheduled for Thursday and the installation may happen as early as next Monday!  The bad news is that we have to pay for the additional time and material.
 
I resumed installing flooring in the hallway, and spent a lot of time making meticulous jigsaw cuts in the boards for the frames at the base of the stairs and closet door.

Cutting pattern
Cut board installed at base of stairs


Tools for installing flooring
Flooring installed with custom cuts under closet door frame


Closet flooring with boards selected for the next four rows

Hallway flooring at the end of the day


Monday, July 11, 2011

Templates

This morning I cleared off the counter tops and screwed in the two spacer boards that I had installed last night on the sides of the dining room base cabinets.  The counter top fabricator representative arrived at 9:30am and brought with him a bucket containing a hot glue gun, lots of glue pellets and some short pieces of wood marked for various standard counter top overhangs for the cabinet tops.  He also brought in a lot of long, thin wood strips and an 8-foot long straight edge.

Tacking wood strips with hot glue to create a template

The wood templates will be placed on our granite, which will then be cut with a diamond tipped, water-cooled circular saw blade in the shop.

Kitchen cabinets with completed templates

Completed island template with 12-inch overhang 


The fabricator rep packed up and left the scene at 4pm - a long day for me sitting and watching someone else work for a change.

I plan to drop by the fabricator's shop tomorrow morning to participate in the template layout on the granite to choose the best area of the two slabs we have stored there.  The vanity was also templated for the marble counter top.  Cutting will occur later this week and delivery and installation should be sometime next week.  We can't wait!