Tuesday, July 12, 2011

You're Gunna Need Another Slab!

Our granite fabricator called this morning to inform me that when they layed the templates on our two slabs of granite, it was clear that we would need a third slab to do it all.  The good news is that the additional granite is in stock and will be available tomorrow for the layout.  Cutting is scheduled for Thursday and the installation may happen as early as next Monday!  The bad news is that we have to pay for the additional time and material.
 
I resumed installing flooring in the hallway, and spent a lot of time making meticulous jigsaw cuts in the boards for the frames at the base of the stairs and closet door.

Cutting pattern
Cut board installed at base of stairs


Tools for installing flooring
Flooring installed with custom cuts under closet door frame


Closet flooring with boards selected for the next four rows

Hallway flooring at the end of the day


Monday, July 11, 2011

Templates

This morning I cleared off the counter tops and screwed in the two spacer boards that I had installed last night on the sides of the dining room base cabinets.  The counter top fabricator representative arrived at 9:30am and brought with him a bucket containing a hot glue gun, lots of glue pellets and some short pieces of wood marked for various standard counter top overhangs for the cabinet tops.  He also brought in a lot of long, thin wood strips and an 8-foot long straight edge.

Tacking wood strips with hot glue to create a template

The wood templates will be placed on our granite, which will then be cut with a diamond tipped, water-cooled circular saw blade in the shop.

Kitchen cabinets with completed templates

Completed island template with 12-inch overhang 


The fabricator rep packed up and left the scene at 4pm - a long day for me sitting and watching someone else work for a change.

I plan to drop by the fabricator's shop tomorrow morning to participate in the template layout on the granite to choose the best area of the two slabs we have stored there.  The vanity was also templated for the marble counter top.  Cutting will occur later this week and delivery and installation should be sometime next week.  We can't wait!

Sunday, July 10, 2011

Slackin'

With the critical mass behind us, I took it easy today and installed 6 pull bars on the island drawers, so Amanda can load them up.  Another 3 drawers will have to wait for smaller bars than the ones provided (sound familiar?)

Six island drawers with pull bars installed
This evening, I cut two filler strips for the sides of the dining room base cabinets.  They are held in by friction only, and I will secure them with screws in the morning.

Dining room spacer installed between drawers and wall

I also made printouts of the dimensional drawings for the faucets and soap dispenser for the kitchen and powder room.  I will give these to the fabricators tomorrow.  They will also take the two sinks and pre-install them in the counter tops as part of their fabrication process.

I still have to clear all of the tools off of the sink area cabinets, as well as miscellaneous items on the dining room cabinets for the counter top measurements tomorrow.  Arrival time of the crew is TBD at this moment.

Saturday, July 9, 2011

Island Panels

Today, I completed the island construction with the installation of the two back panels, one six feet long and one four feet long.  Both were quite heavy!  The pull bars for the cabinet doors and drawers will be installed tomorrow, and the kick space veneer will be one of the last bits of detail work at the end of the project.  We are now ready for the granite fabricator to take measurements on Monday.  Actually, they make templates to achieve a more precise pattern.  Stand by for some photos of that process in Monday's blog. 


Here is one of the 96-inch long panels ready for cutting to size.

Level clamped to wood as an edge guide for the jig saw

While I cut the panels, Amanda did a bang up job of cleaning the stainless steel surfaces in the kitchen and then organizing and cleaning a lot of the stuff we had piled into the living room to clear space for the construction project.


For lunch today, we fired up the grill around 10:30 and filled a pan with chicken thighs slathered with some yummy BBQ sauce.  Here it is ready to come off the grill after achieving a 190-degree internal temperature.  We spooned some of the sauce onto some baked beans to enhance them as well.  Who says you can't cook just because you don't have a kitchen!?

Very yummy BBQ chicken


Drilling pilot holes for decorative panels

After lunch, I brought in the cut panels and screwed them into the backs of the cabinets.

**Comment from Amanda: Please note Dad's patented technique of bending over, making his body almost U-shaped, to drill the holes.  Somehow, this was successful for him.  But mostly, it was amusing for me. :)


Here are a couple of photos of the island with the panels installed:

View from kitchen stove area

View from the dining room

Friday, July 8, 2011

An Ell of a Time

3" spacer clamped for drilling


Today was spent on the two end cabinets that give the island an "L" shape.  After Sharron and I discussed our approach to how we would fashion the inside corner, I spent a considerable amount of time getting the cabinets leveled.  Here's the first 3" spacer clamped and ready for drilling to form part of the inside corner.


The next step was to install the 2x4 block for the last cabinet and drill holes and run the power wire for the outlet on the side of the cabinet.


End cabinet wired and blocked before returning upright


Here's the finished inside corner.


The two end cabinets were then blocked to the rest of the lineup for a very solid structure.


Spacers installed on last two cabinets

Spacer block between cabinets to maintain proper alignment and to add stability


We will install the two back panels tomorrow to complete the island installation work required for the granite fabricator to take measurements on Monday.  The kick space trim work will be done later.

Thursday, July 7, 2011

Half an Island

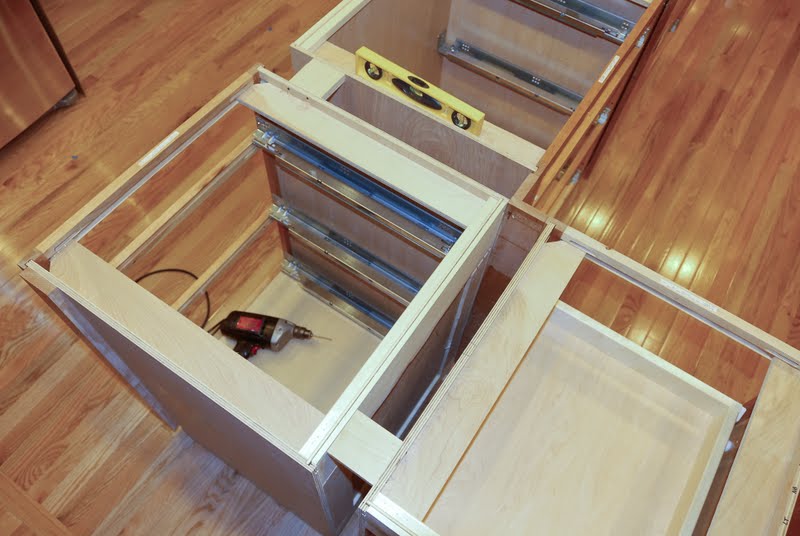
This morning, I cut holes in the end cabinets for the AC outlets, then began shimming the first three cabinets to get them level and in line with each other.  The blue tape in this photo was used to mark the position of the first cabinet.

Marking shims


Here's the first cabinet on its back to facilitate the installation of a piece of 2x4 (with 3" lag screws) to enable me to later secure the cabinet with screws through the bottom of the back panel.  The wire for the outlet is shown here running through the floor (hated to drill into our pretty, new floor boards) and terminates in a junction box that I installed in the basement.  The second outlet wire will also run to this junction box and a feeder wire will be run to the breaker panel for power.


Outlet and cover plate installed and wired 


I aligned, clamped and screwed the front panels of the three cabinets to each other, then ran a string along the back of the cabinets to ensure proper alignment before installing some shims between the cabinets to preclude any movement.  The cabinets are locked to the floor and to each other and have a very solid feel to them.  I plan to finish the island tomorrow.

Alignment string and levels


Spacers between cabinets


Wednesday, July 6, 2011

Dishwasher Installation

I spent the entire day getting the dishwasher installed and leveled, along with a support structure to secure it to the cabinets.  It is now wired to the circuit breaker and lines for the water supply and drain are connected. Once we have a sink and disposal, I'll connect the other ends of the water lines under the sink, test for leaks and give the dishwasher a smoke test.  I also got the second spice rack installed next to the dishwasher to complete the main kitchen lineup, as seen below..


Amanda put Post-it Notes on the cabinets to designate what will go in them, and started transporting some items that we've been temporarily storing in the dining room cabinets.

Kitchen cabinets labeled with Post-it Notes

Unloading the dining room cabinets


 Since we won't have a wooden counter top to support the dishwasher, I made a frame to do the job.  This supports both the dishwasher and the spice rack

Dishwasher and spice rack with cross-bars tied into adjacent cabinet and wall stud
Support structure detail with angle brackets and screw into wall stud

Tomorrow I will work on the AC outlets and floor bracing for the island.  My goal is to complete the island on Friday.